|
by Michaela Moore JDHS, ELA & Drama 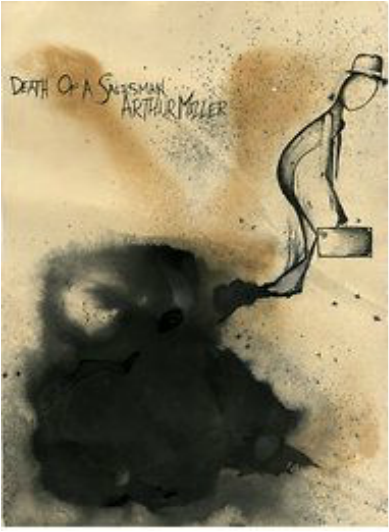 Poster by Ashley Butler, Parsons the New School of Design To introduce the play, Death of a Salesman by Arthur Miller, I first put an image from a poster of the play on the overhead and had the students go through the Thinking Routine of SEE/THINK/WONDER:
After this Thinking Routine, I asked the students to complete a Crowdsourcing activity about Arthur Miller. The students found information quickly about Arthur Miller and came up and wrote in a word splash on the whiteboard fun and important facts. We took a few moments to discuss surprises and interesting facts found in table groups and in whole group. Then I asked the students to prepare for notes: I introduced the 4 main characters from Death of a Salesman to students and asked them to choose one character that they would focus on in their project and notes. I instructed the students to write anything important down about the character (personality, weaknesses, strengths, choices, goals, motivations, etc) while we watched the play. After we finished watching and discussing the play, I passed out the text of the play and asked the students to fill in holes in their notes about their characters AND to add important quotes said by their characters, or important quotes others said about their characters. 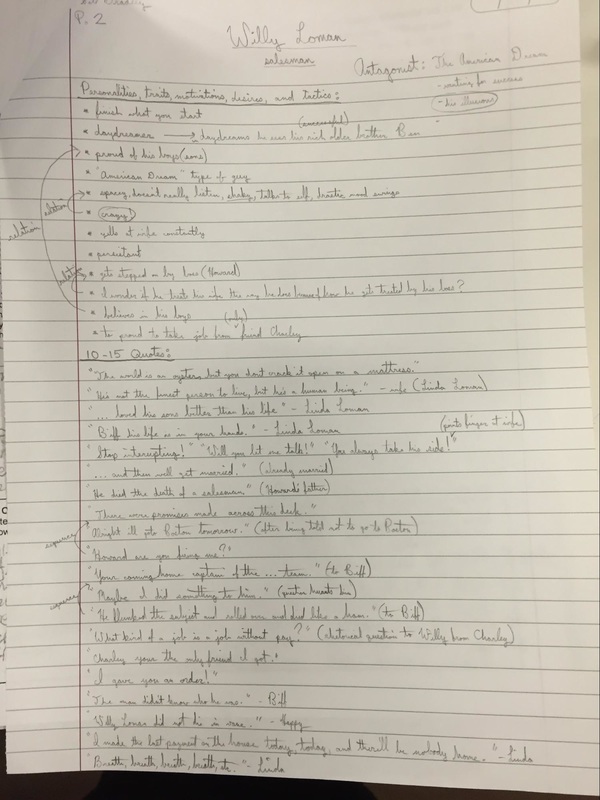 Once, these notes were complete, I taught the students step by step how to draw a caricature of their character beginning with a sketch first and then moving into their final draft. We first discussed the idea of caricatures and how they were different from real portraits or pictures. We discussed the symbolic nature of caricatures. (Learned from work of Richard Jenkins).
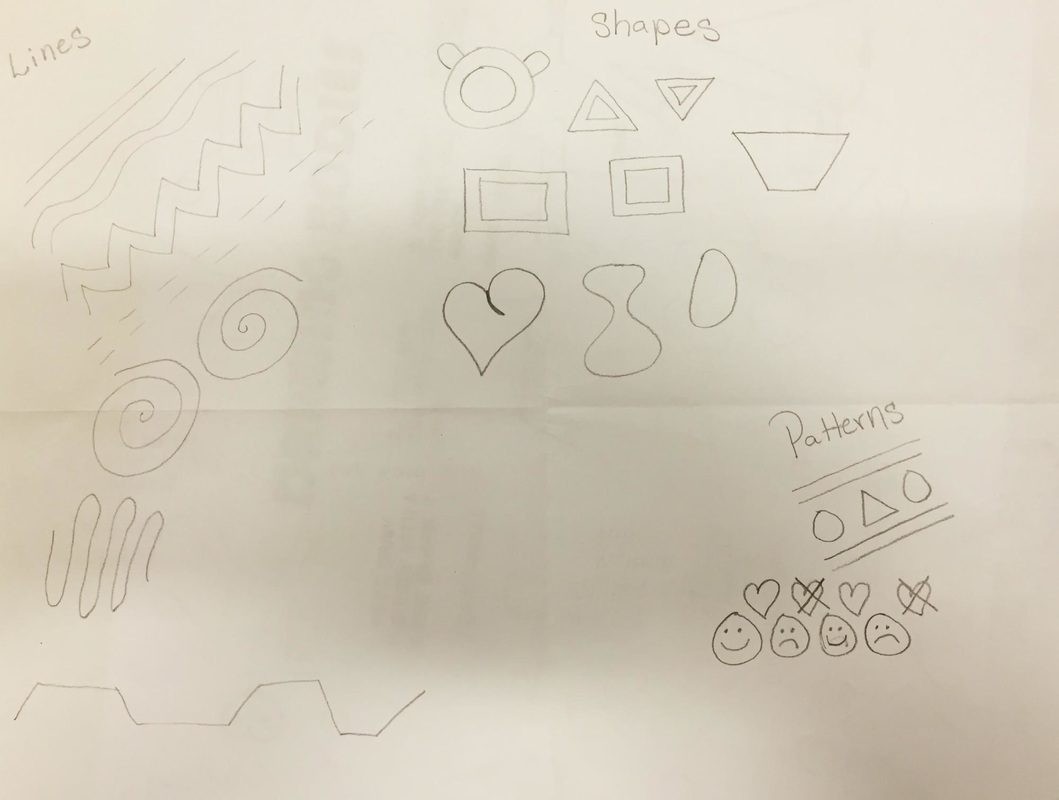 2. Show the students how to draw a caricature from lines, shapes, and patterns and have them draw your example, and have them rough draft sketch out a caricature of their Death of a Salesman chosen character. 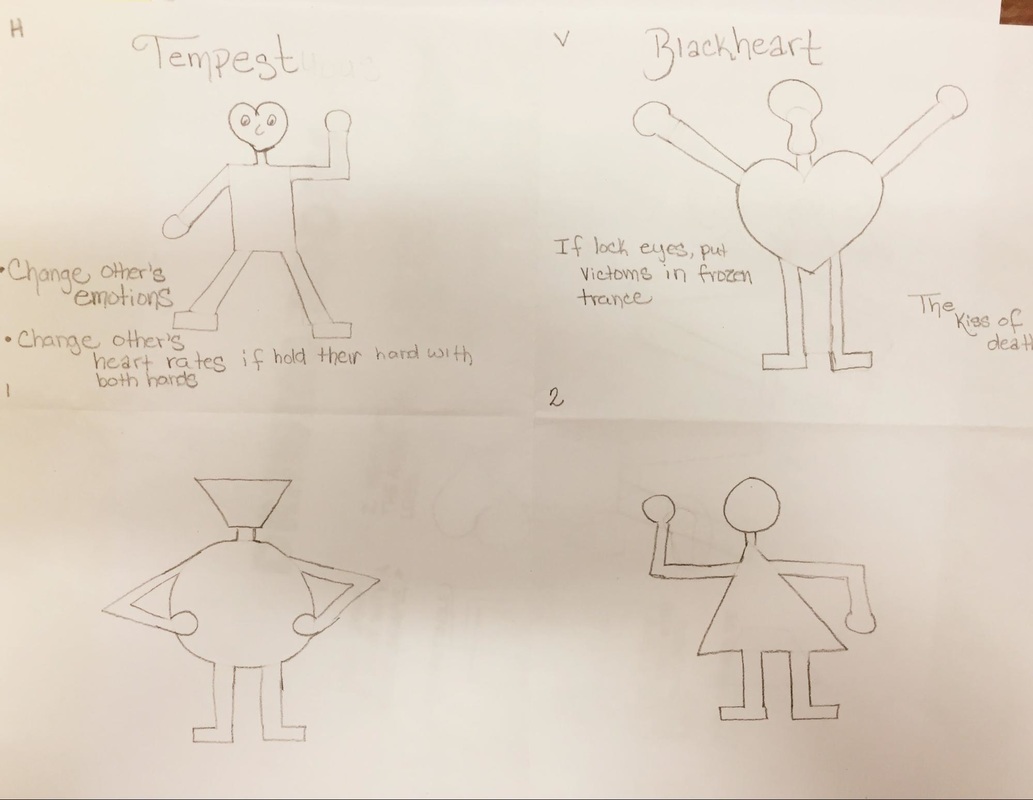 3. Show the students how to turn their sketch into a real caricature of their chosen character. 4. I showed the students how to do Richard Jenkins’ inking technique (using sharpie to outline your pencil drawing) and then coloring technique (how to use colored pencils to get different shades and different textures) and shared with the students Richard Jenkins’ helpful handouts on hair and faces.
0 Comments
by Mareta Weed Auke Bay Elementary, 3rd Grade 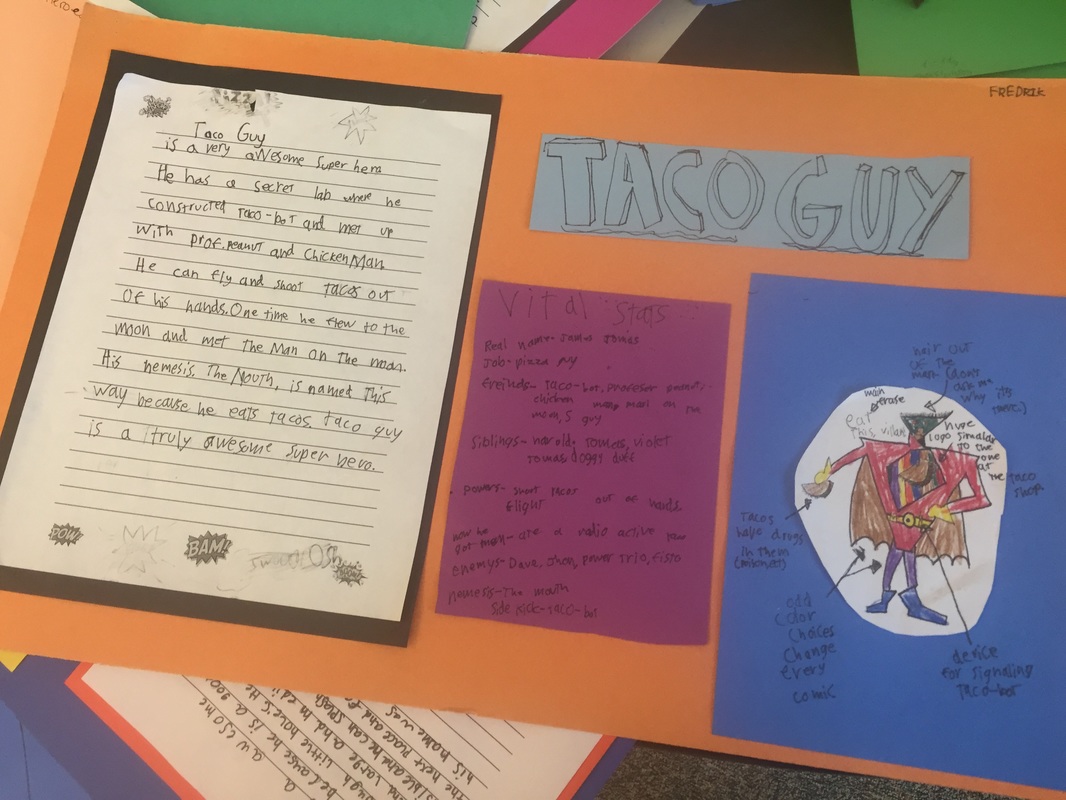 There is professional development, and then there are the classes you sit through and can’t wait to try the concepts out with your students. That is how I felt when I attended Richard Jenkins' Super Powered Stories Workshop on a sunny Saturday in March. Like a lot of classes my group of third graders love to draw, but getting them to write can be a struggle. That morning, while creating my own super hero, I could definitely see how engaged my students would be and I could just imagine the backstories that they would write to go with their created heroes. The problem was, we had just finished a narrative unit and we needed to do some informational writing. Wasn’t I always reminding students that expository text could be fiction? An idea was born. Students could practice their sentence writing by creating a paragraph about their hero, and then create a diagram labeling the different parts of their hero. The end result would be a poster. I was ready for Monday; well, sort of. As I had been absent the previous Friday, my students had attended their own class, a kids version of Richard Jenkins' lesson, without me. Would students still have their work from Friday? Probably not. How much would they remember from their class? If we repeated the lesson would they be bored? “But Mrs, Weed, we’ve done this before”. I decided to have students start from scratch, with the expectation if they liked one of the characters they created before, they could create a final draft of that character. Monday started off without a hitch with students telling me what they had remembered from the following Friday. We got started with a warm up, and I waited for the whine, “but we did this Friday!” It never happened and believe me, I was prepared for it. I didn’t even hear it when we started to talk about creating the rough drafts of our heroes, going through the steps that students had gone through with Richard three days prior. Students were engaged the whole time. Yes, I got the occasional reminder about how to do the next step, but my class was really into about the entire process. I did model and go over concepts a little faster then I would have done with a class that had never seen it before. Overall, the class kept up; when they were done with their heroes, they worked on their villains. 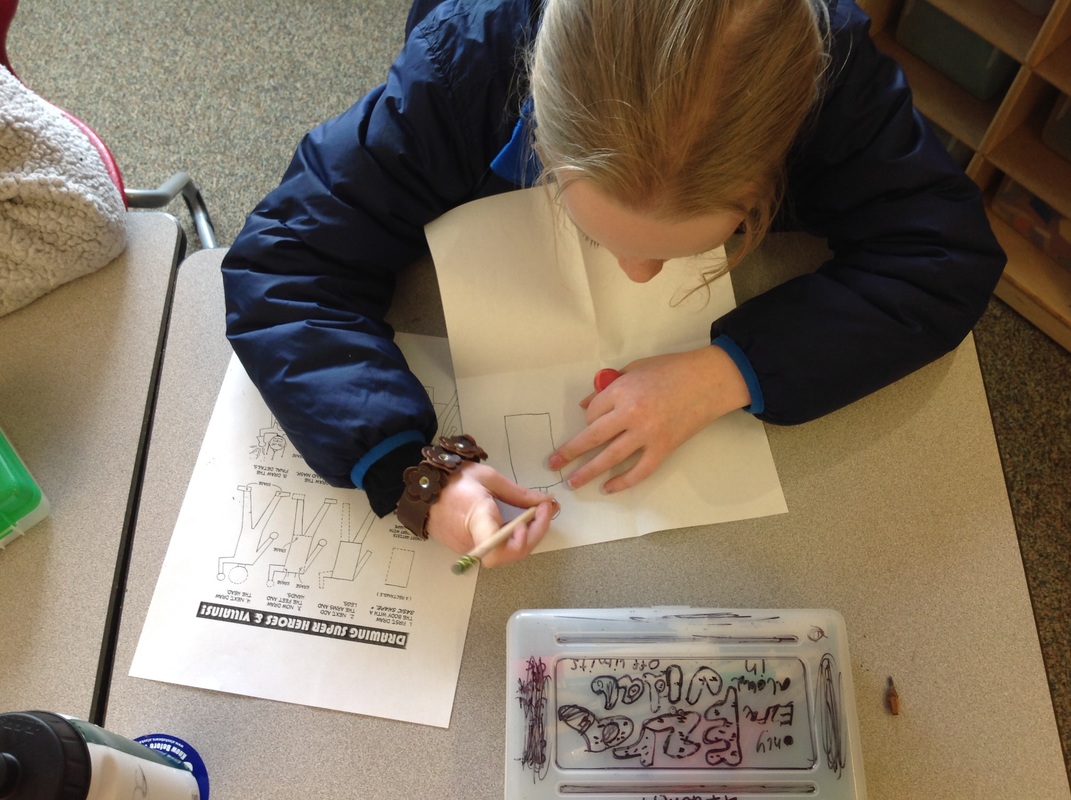 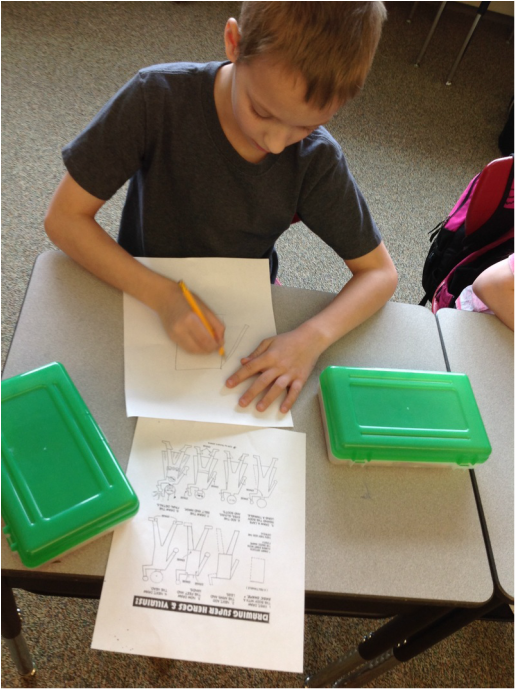 by Nancy Lehnhart JSD Elementary Art Specialist 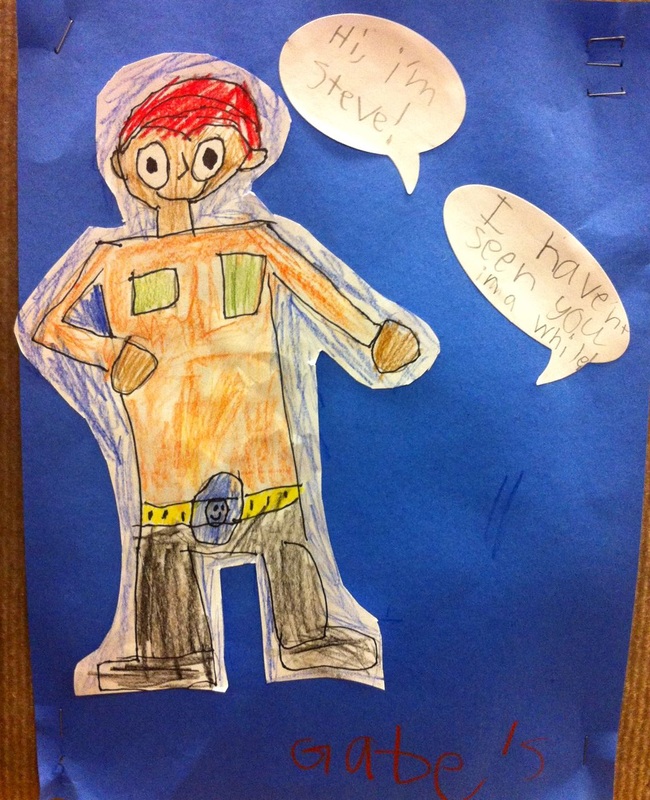 I’m not sure why it is, but kids seem to put a lot of stock in drawing as the quintessential qualification for being an artist. When you ask them if they know any artists, they will almost always tell you about someone they know who can draw. I was really curious about this early in my art teaching work, and also noticed that at a pretty young age, most kids decide they can’t draw (and therefore are not an artist.) And it was actually true; the development of their drawings seemed to stay at about a 2nd or 3rd grade level. Indeed, most adults will tell you they “can’t draw a straight line” and if pressed to draw something, you might confuse their drawings with a kid. I guess we just can’t keep very complex symbols in our heads, most of us, so if we’re trying to reproduce these simple symbols we have memorized, it stays pretty elementary. Somewhere in my early years of teaching I learned about the Reggio Emilia schools in Italy. I was mostly fascinated by the drawing these kids were doing, and how drawing was incorporated into learning as a tool for observation and investigation. I started experimenting with the young children I was working with, both at Juneau Co-op Preschool and in my own kids classrooms in elementary schools. I used a lot of the Drawing on the Right Side of the Brain language, brought down to a young child’s level. And I was impressed! Young children really did seem to take to it naturally. Their drawings were amazingly realistic, even while they were still delightfully quirky as a child’s drawing. 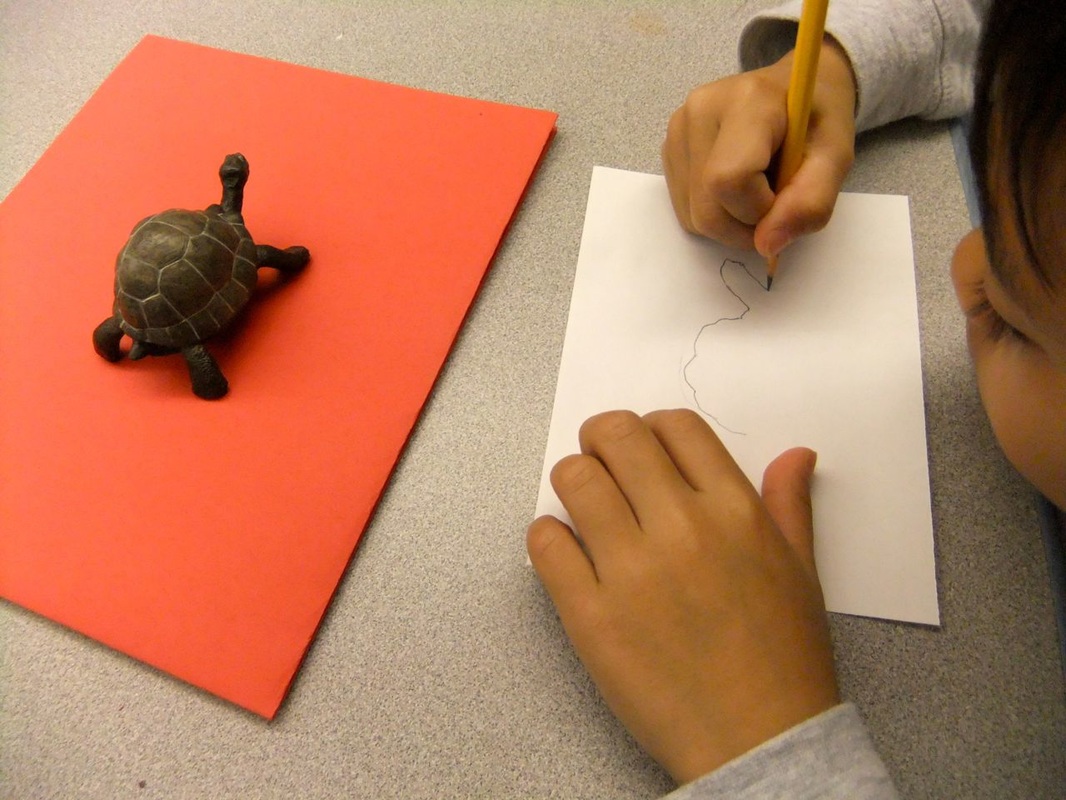 Because of this, I’ve become pretty zealous about teaching and encouraging kids at all grade levels (and adults!) to practice drawing from observation. Which basically means, find something to use as a model, (a feather, a worm, a car, a very still friend, a photo,etc.,) observe it closely, resist drawing a pre-conceived “symbol” for it, and slowly, draw the shapes and lines you see. You’ll be impressed with yourself. Anyone can learn to draw this way. And it’s not that drawing makes an artist, but why not make sure kids know they can learn to do it if they want to!
Over the years of developing art kits for the Juneau School District, I’ve made sure there is a “drawing from observation” art kit for each grade level and I’m kind of preachy about it. I was worried that if teachers did too much of the “This is how you draw a dog,” step by step stuff, kids would learn to see drawing as steps you had to memorize, and if you couldn’t remember a step, well, you just couldn’t draw a penguin or bear or whatever. I wanted them instead to know you simply just needed to find a picture of a penguin (or a real one) to look at and you could draw it very convincingly from observation—and this is actually what most artists do—most artists don’t draw things out of their heads! |
ArtStoriesA collection of JSD teachers' arts integration classroom experiences Categories
All
|
 RSS Feed
|
|
Artful Teaching is a collaborative project of the Juneau School District, University of Alaska Southeast, and the Juneau Arts and Humanities Council.
|