|
by Nadine Marx 4th Grade, Auke Bay Elementary 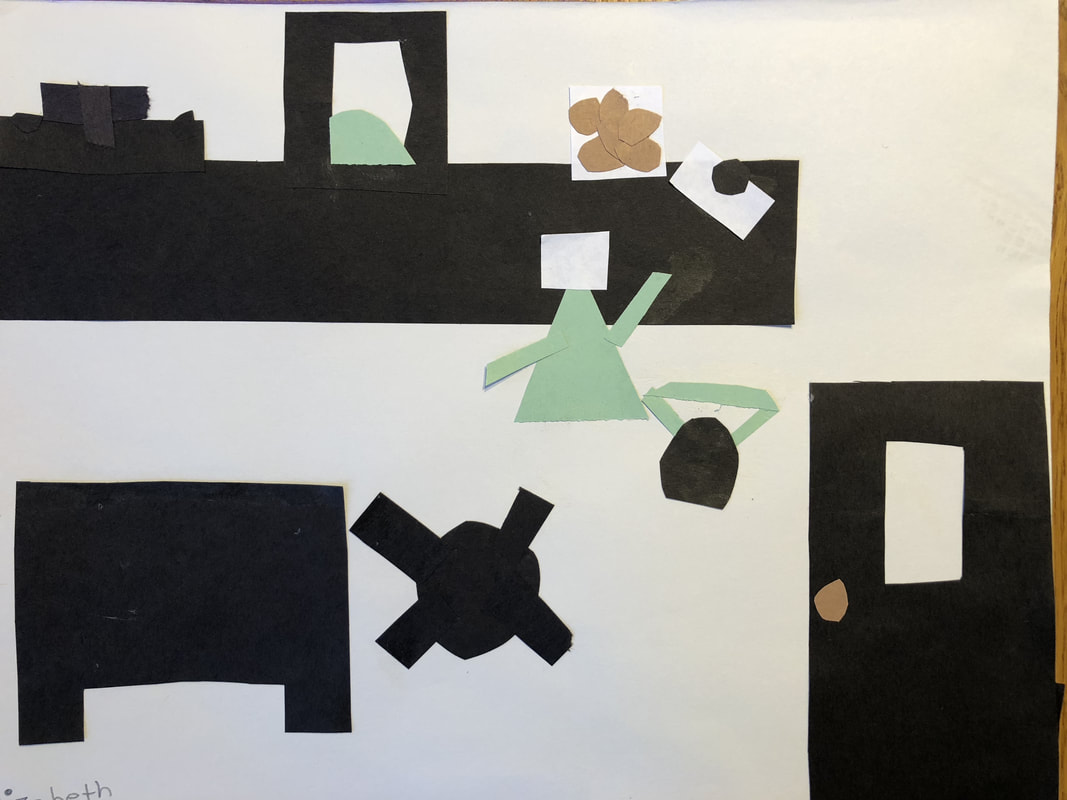 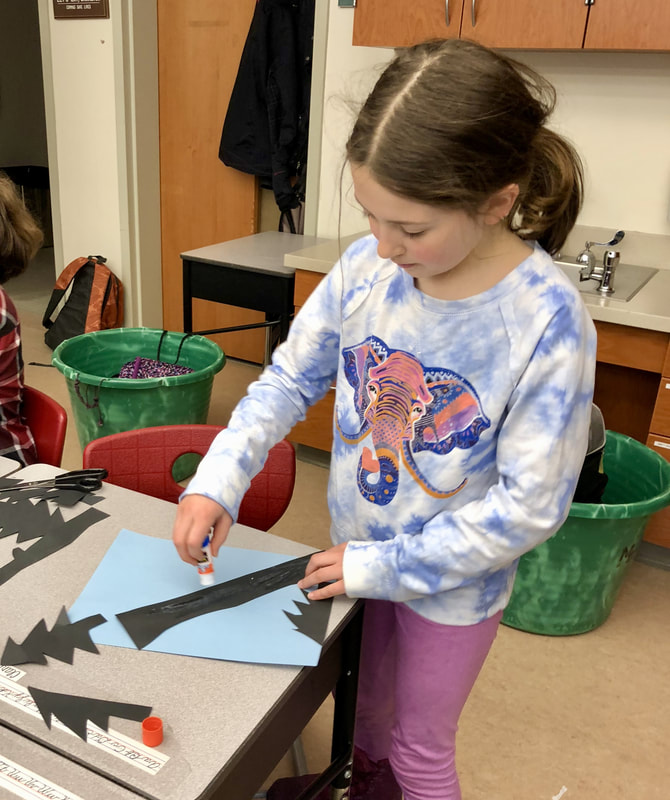 Too often I see a blank stare on my students’ faces when they are tasked with writing. The pressure of an assignment empties their brains of ideas and they don’t know how to start. After participating in Jamin Carter’s workshop, Cut Paper: A Pathway to Creative Writing, I was excited to try his way of warming up students by integrating art into the writing process. Students would learn about art elements (shape, size, color, space) and create a piece of art using construction paper, scissors, and glue, and in doing so, would plan the setting, characters, and problem in a story before being asked to write a well-developed narrative. Before teaching Jamin’s lesson, I led students through mini-lessons on story structure, problem and solution, figurative language, and how to write and punctuate dialogue. Then, over two days, I taught Jamin’s lessons as scripted in the materials provided at the workshop. Students enjoyed learning the gestures that went along with the art elements. They loved playing Pass the Setting, and were excited that they would create their own picture of a problem that they would write about. On Day 3, I was surprised (and delighted) that most students had no problem thinking of a problem to illustrate, and were able to get right to creating a picture. One student needed some time to think of a problem, but then easily finished his picture within the time given. Students were asked to create a paper scene of the problem, or the middle of their story, showing setting, time of day, characters, and lastly, give a hint as to how the problem might be solved. 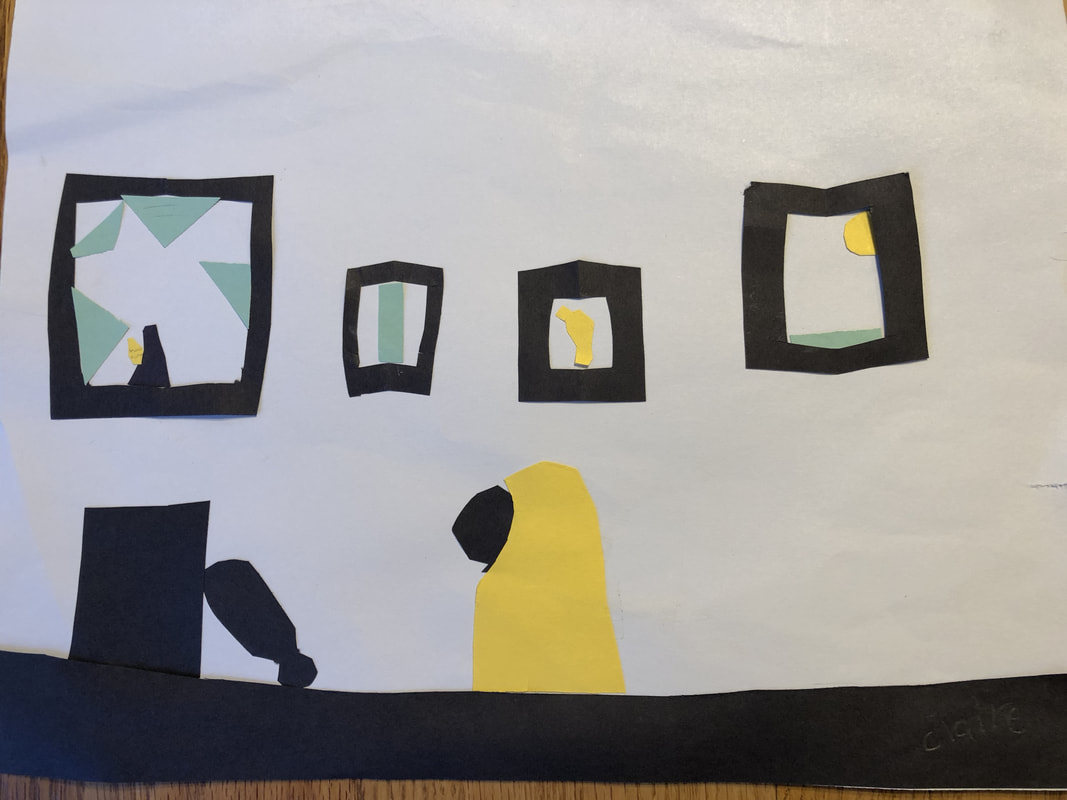 On Day 4, students got started with their narrative writing. I was clear about my expectations, showing them a scoring guide I would use to evaluate their writing (thinkSRSD.com). Because of increasing expectations for 4th graders to type responses on assessments, I provided a google doc for students’ writing. Three of 23 students opted to write their story in their journals, while the others typed. 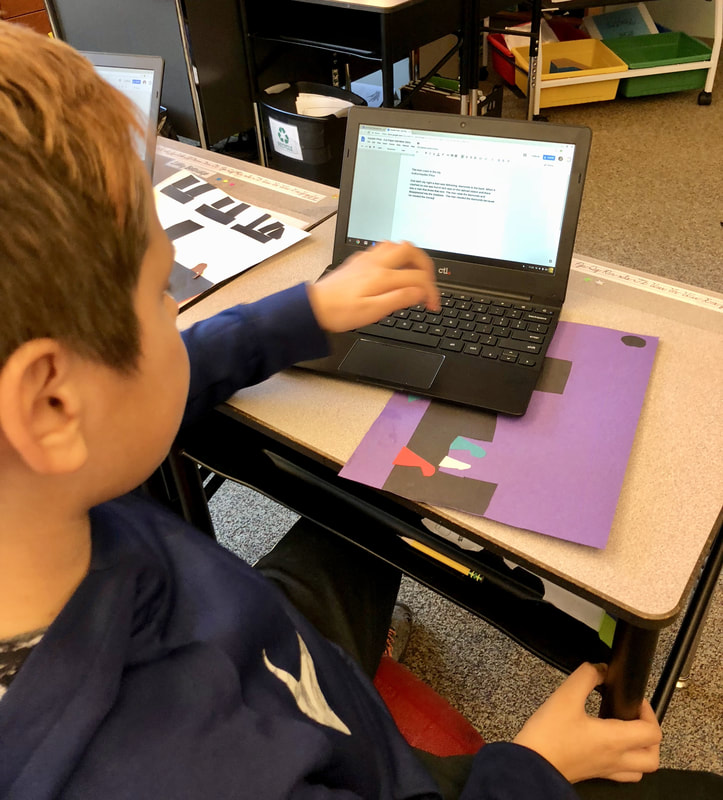 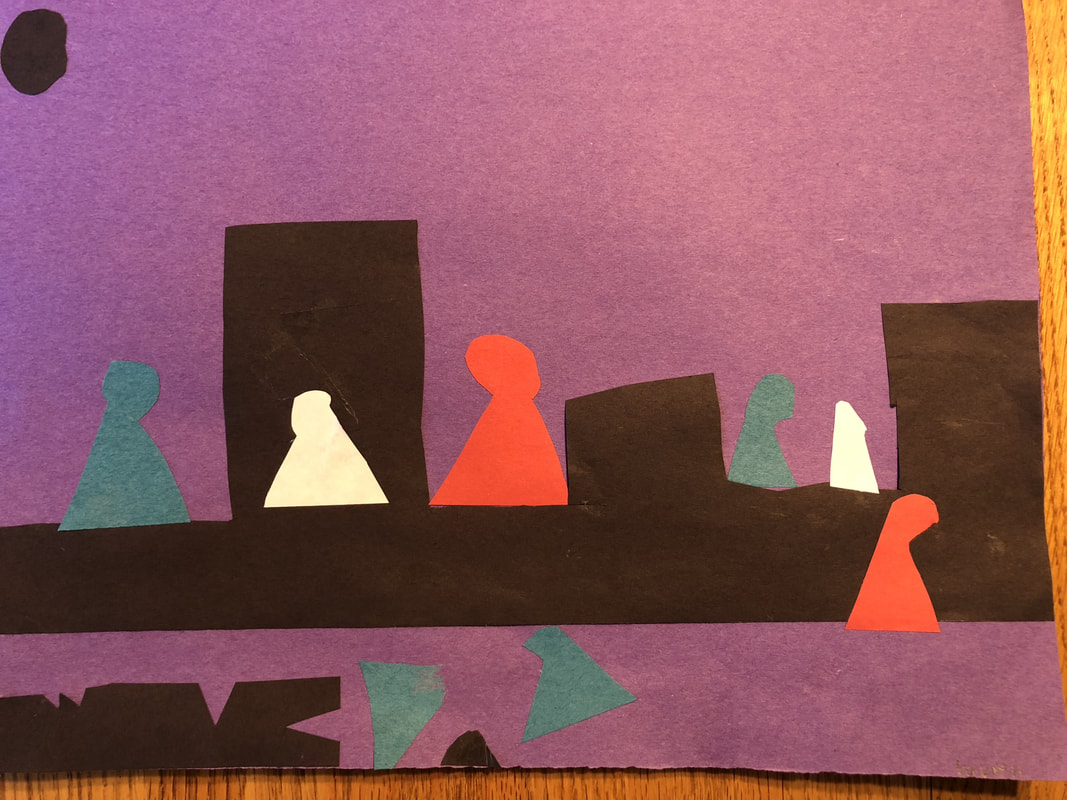 When students had their first draft of their story done, I asked them to complete an “Exit Ticket” on Google Forms about the project. I asked if they finished their art, if the art helped them plan their story, if the art helped them write their story, and if they would like to do this again. Questions 2-4 were answerable on a scale of 1 to 5, 1 being on the No end, and 5 meaning Yes. Offering these choices may have been a mistake, since students gave a lot of 3s, making data less telling. After reviewing answers, I printed the individual forms, allowing space at the bottom for a written explanation of their answer. This was more helpful. But because I was asking students for multiple edits and rewrites, most written comments were harping on the amount of work this project was. Apparently they did not like to edit. A few written comments expressed the students’ enjoyment of the project. 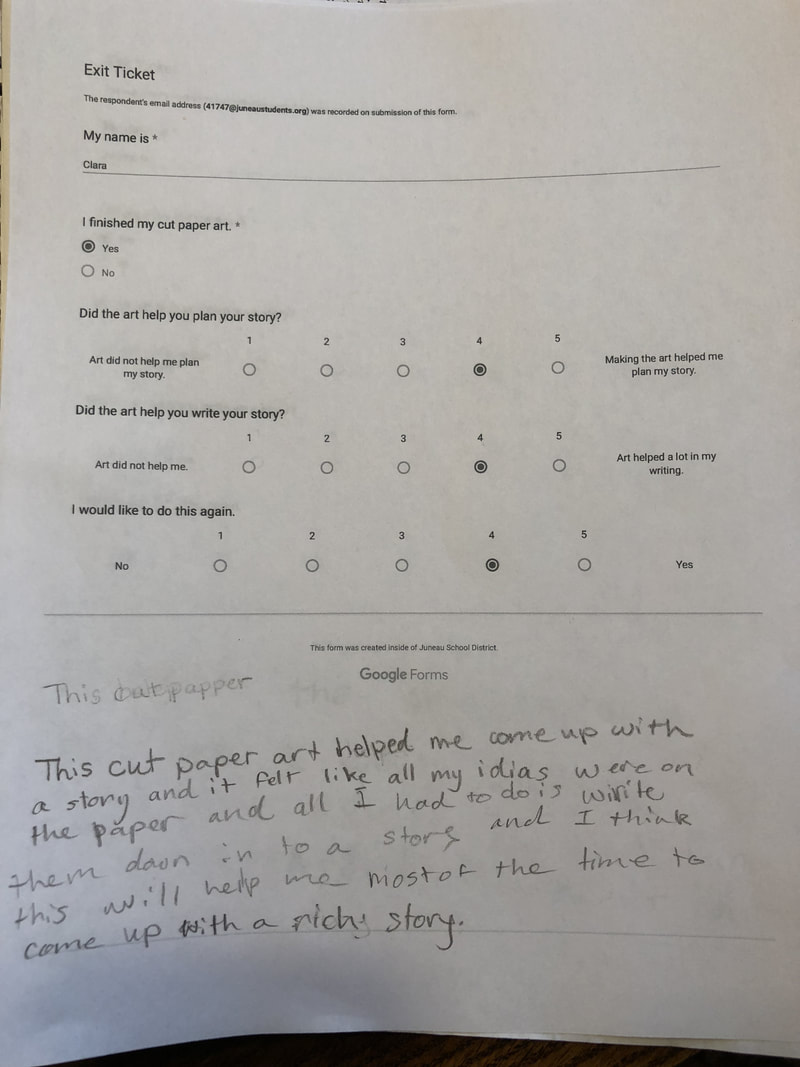 My own observational data led me to believe that creating the picture of the problem before writing the story was highly effective. Students had created the setting, characters, and problem and had thought about the solution before starting to write. I thought that students seemed to be writing their stories more quickly, and just as I had felt that the story flowed out of my pen after having done most of the thinking and planning beforehand during the workshop, I thought that students’ writing seemed to be an easier process for them. I did not see students staring blankly at the screen or page, and if they were, it was because they were trying to think about how to satisfy the expectations of the scoring guide. Would I do this again? Absolutely! It did take a good bit of class time to teach the art concepts and go through practice to get them ready for their part. My class worked on this during the last week of March, and had we done this earlier in the school year, we could have had more opportunities to create additional cut paper stories and write them. At this late date, we had to finish assessments and complete the last of our 4th grade tasks. Next year, I would teach this in August or September, and use the strategy several times throughout the year, making the time invested in the background knowledge more useful. Trapped! 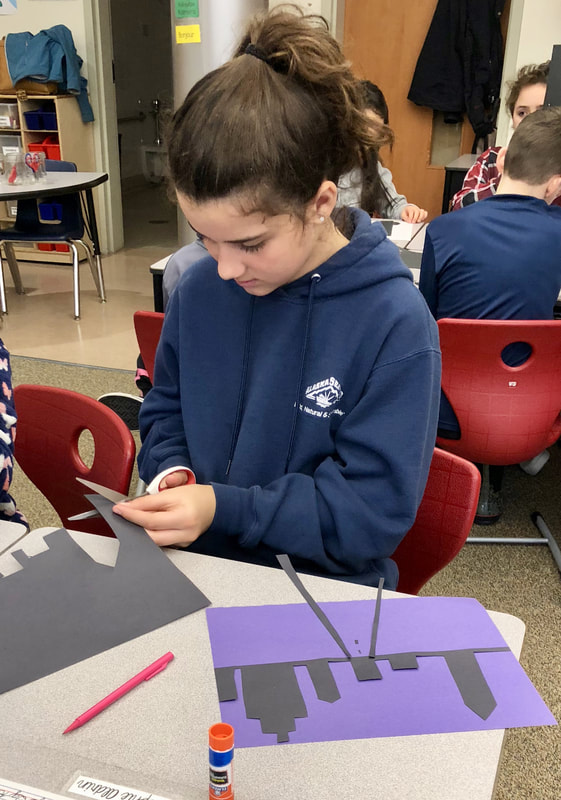 By creating art, and thinking about art elements of shape, size, space, and color, students planned the setting, characters, problem and solution for their narrative stories while engaged in creating with paper, scissors, and glue. They planned setting while choosing a background color to represent day or night, or interior lighting. They cut out trees or furniture or buildings and further developed their setting. They thought about character development while shaping their characters, choosing colors and shapes that would represent who their characters where and how they would interact. They added shapes to represent the problem of a broken vase, a cookie jar that was out of reach, a train that crashed or stolen jewels. Then they developed a visual clue of how their problem could be solved. While working on their art, students talked with their table groups about the process, and got more ideas, and explained to each other what each part meant. When it was time to write, their stories were written in their minds, and they only needed to get them out in words. Often teachers ask students to write and then give them time to create visual art as a reward for getting their work done. This now seems backward to me. Having intentionally created art with a meaningful setting, characters, and plot, students were more than ready to write.
0 Comments
Observations by Becky Engstrom 3-5th Grade TED Specialist, Gastineau and Harborview Schools BACKGROUND As a specialist serving intermediate students grades 3 through 5, I have always rotated language arts units on a 3-year basis to be sure students are offered an eclectic mix of content supported by lessons to improve reading and writing skills. One of my favorite units has always been an art biography unit. Students would do research on an artist collecting pertinent facts by taking notes. They would use the notes to write a three paragraph report on their chosen artist. They would write haiku poetry about their artist and the art work. They would create a piece of work combining their artist’s style and beliefs with their own, then they would support the piece they created with a description explaining their reasoning behind their work of art. All these parts are then mounted on a poster board which has always made for a beautiful display. 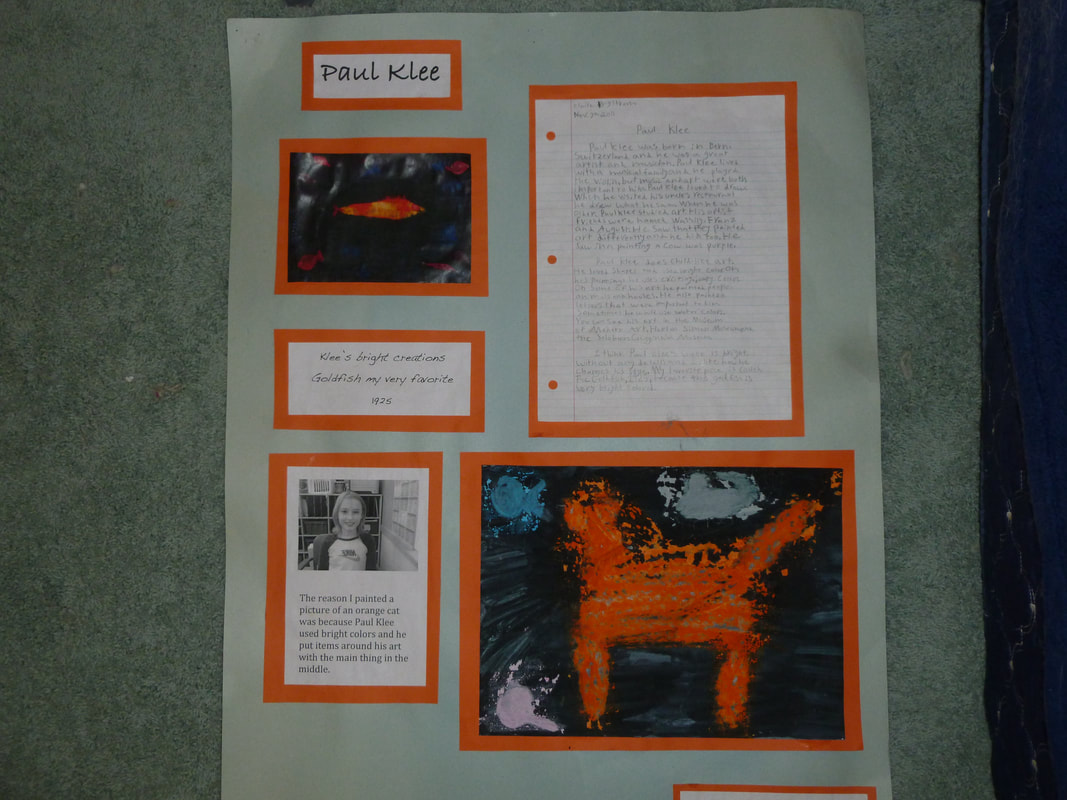 CHANGE After signing up and committing myself to the study of Artful Teaching, the first thing I wanted to do was change this unit to create more opportunities for authentic artful thinking using a variety of thinking routines from different thinking dispositions. I experimented with a selected artist to experience different routines that would help students when they finally selected the artist they wanted to study. I chose Frederic Remington to learn and model different thinking routines. We did a verbal See/Think/Wonder in table groups with different Remington pieces, then used the same pieces to do a verbal Beginning/Middle/End. We experienced Step Inside with a work from Remington. We studied desert vocabulary (mesa, plateau, canyon, butte, saguaro, ocotillo, etc.) and used that vocabulary to create tableaus. ON THEIR OWN After students selected their artist, gathered notes, and wrote their report, I selected a piece from their artist, printed it out, and students wrote their See/Think/Wonders on the printout. Students also selected a piece from their artist that they wanted to attempt to turn into a Tableau (step inside). The student who selected their piece would become the tableau director and had to put people in position until they were satisfied with the outcome. It gave me a good understanding of which students had excellent communication skills and which students needed improvement. It also helped me see the students who noticed many details and the ones who did not. I would have to bring focus to areas in the piece with questions… “What direction are they looking?” “What is their hand doing?” The amount of information I received from this one activity was a true eye-opener! Students also extended their thinking by creating a piece of art that connected their own thinking to the artist they were studying. CRITIQUING AN ARTIST Students wrote a research paper on the artist they picked. The last paragraph was their opinion of the artist they selected. I especially enjoyed reading these paragraphs. NEW PROJECTS DISPLAYED IN RETROSPECT
Although I believe the old poster board displays were more visually pleasing and beautiful, the new displays showed more artful thinking; the most beautiful moment to catch is proof of a brain in action. Whereas the old displays had more writing skills involved, the new supported the process by which learning took place. It was inspiring to watch the students make incredible observations. To listen to the details noticed to create the tableaus was a treat. To read their observations of the students’ chosen artist was deeply satisfying. Teaching became more passive, as if I handed the wheel to the students because they were ready to drive. It’s scary, and wonderful at the same time. by Michaela Moore JDHS, ELA & Drama 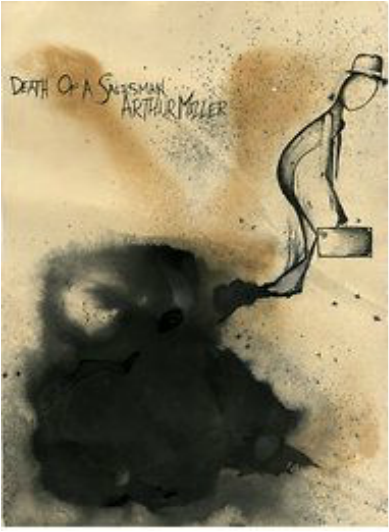 Poster by Ashley Butler, Parsons the New School of Design To introduce the play, Death of a Salesman by Arthur Miller, I first put an image from a poster of the play on the overhead and had the students go through the Thinking Routine of SEE/THINK/WONDER:
After this Thinking Routine, I asked the students to complete a Crowdsourcing activity about Arthur Miller. The students found information quickly about Arthur Miller and came up and wrote in a word splash on the whiteboard fun and important facts. We took a few moments to discuss surprises and interesting facts found in table groups and in whole group. Then I asked the students to prepare for notes: I introduced the 4 main characters from Death of a Salesman to students and asked them to choose one character that they would focus on in their project and notes. I instructed the students to write anything important down about the character (personality, weaknesses, strengths, choices, goals, motivations, etc) while we watched the play. After we finished watching and discussing the play, I passed out the text of the play and asked the students to fill in holes in their notes about their characters AND to add important quotes said by their characters, or important quotes others said about their characters. 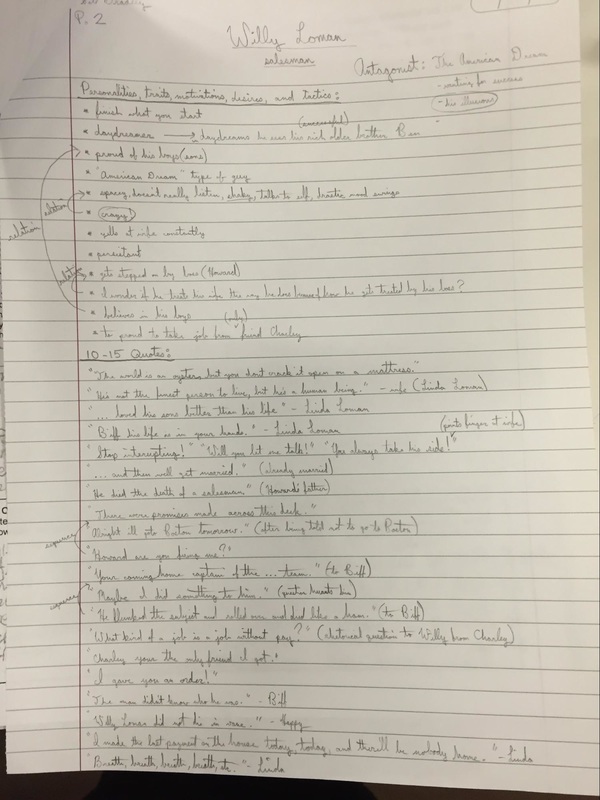 Once, these notes were complete, I taught the students step by step how to draw a caricature of their character beginning with a sketch first and then moving into their final draft. We first discussed the idea of caricatures and how they were different from real portraits or pictures. We discussed the symbolic nature of caricatures. (Learned from work of Richard Jenkins).
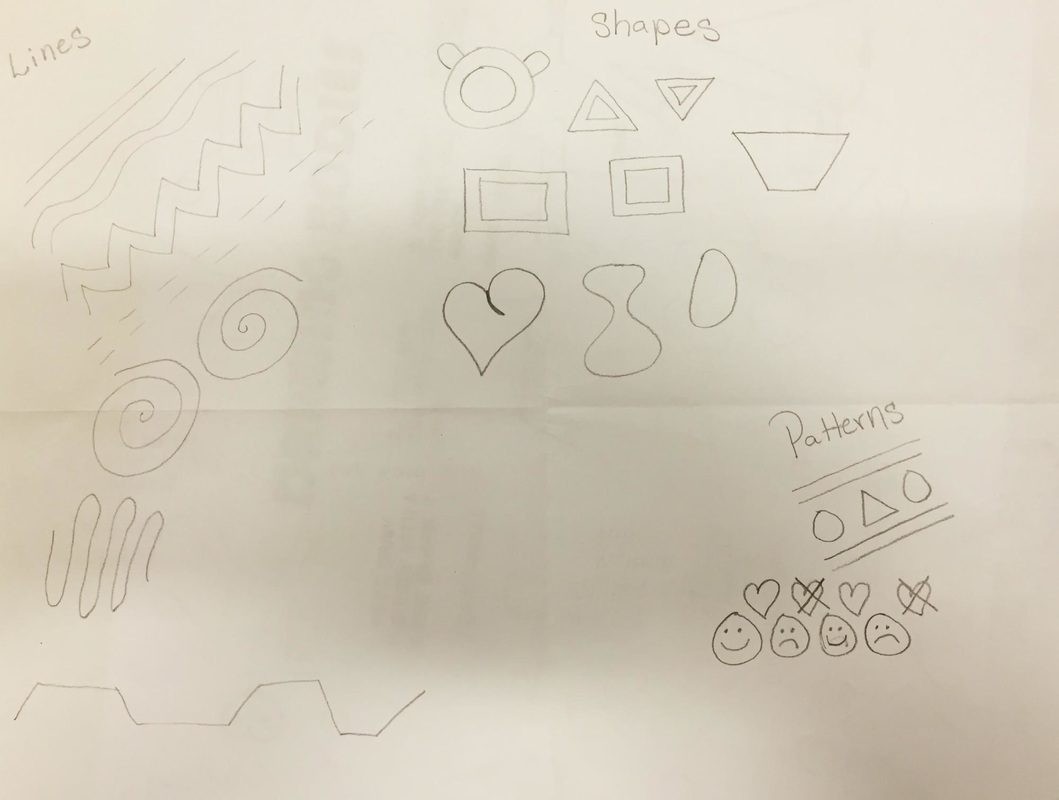 2. Show the students how to draw a caricature from lines, shapes, and patterns and have them draw your example, and have them rough draft sketch out a caricature of their Death of a Salesman chosen character. 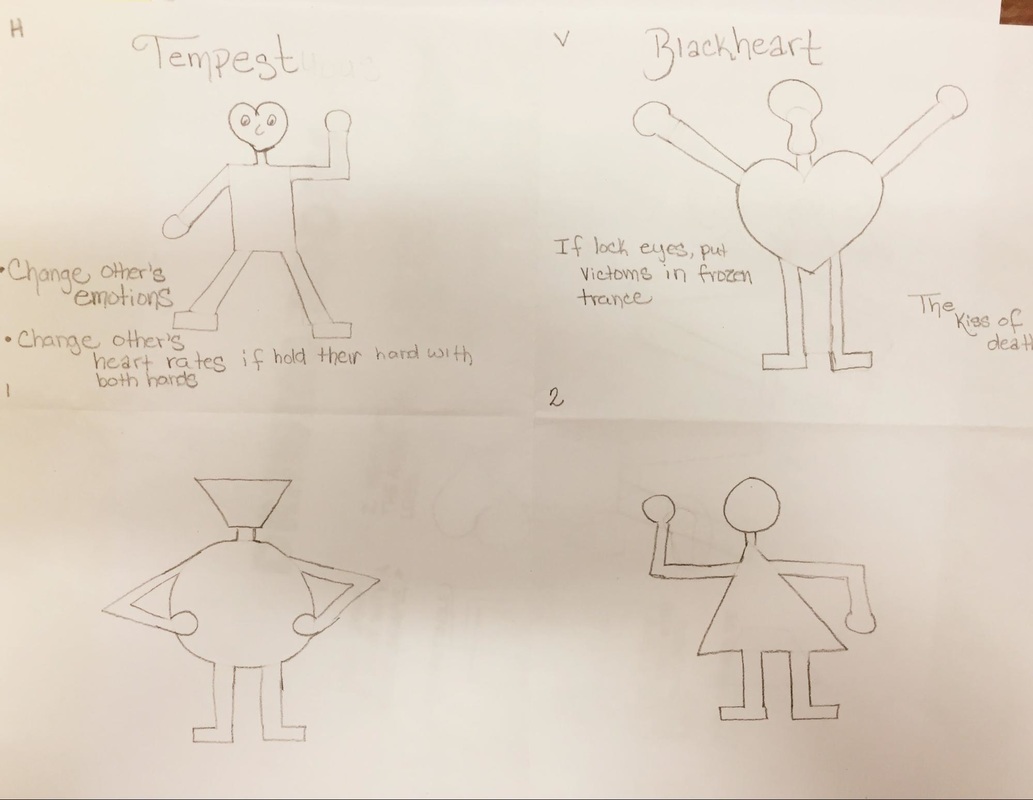 3. Show the students how to turn their sketch into a real caricature of their chosen character. 4. I showed the students how to do Richard Jenkins’ inking technique (using sharpie to outline your pencil drawing) and then coloring technique (how to use colored pencils to get different shades and different textures) and shared with the students Richard Jenkins’ helpful handouts on hair and faces.
by Maura Selenak Harborview Elementary, Kindergarten 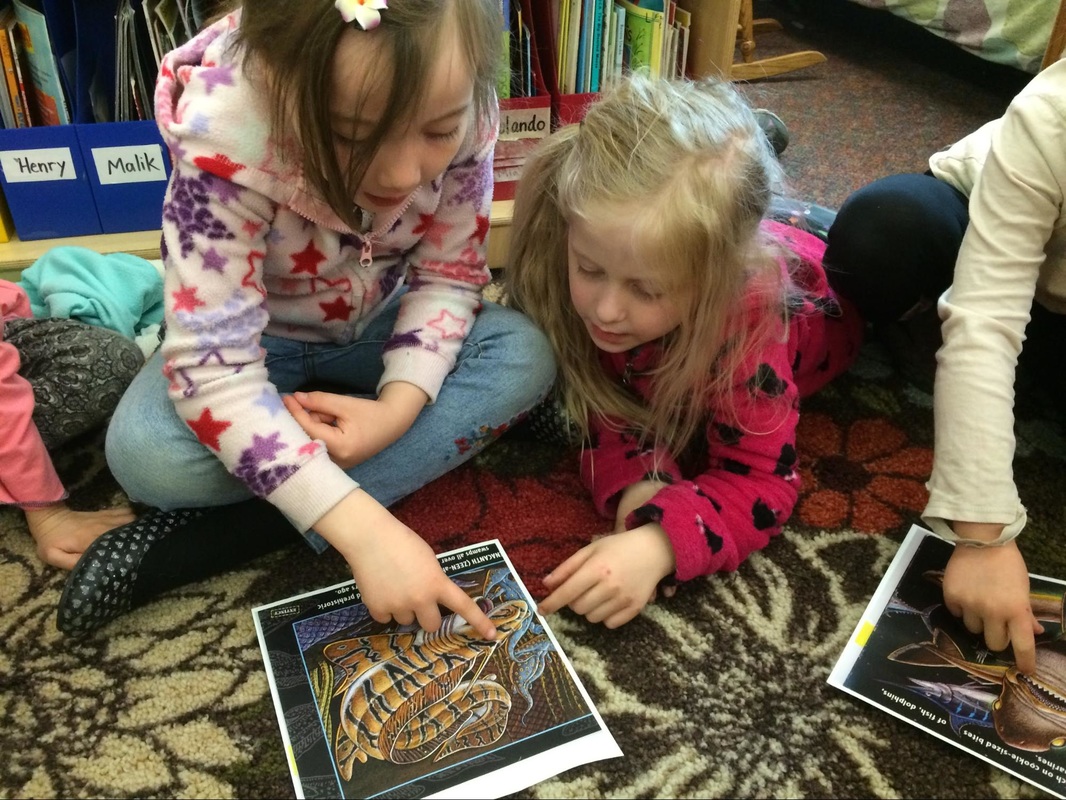 I learned a routine called Pass the Portrait at a recent inservice with Melanie Rick, an instructor from the Kennedy Center for the Performing Arts. To play Pass the Portrait, students are seated in a circle, facing a partner. Before beginning, students must show the place between them where they will be placing the piece of art (this is an important step because it helps avoid conflicts). In the game, students are taught how to “read” a portrait by discussing things like facial expression, gesture, and focal point. The teacher places a printed portrait in the predesignated spot between each pair of students. The students have one minute to discuss the picture before the teacher starts counting down aloud- “10, 9, 8, 7, 6, 5, 4, 3, 2, 1, pass….the….portrait….!” The expectation is that students will wrap up their discussion by the time the teacher gets to 1, then will pass the portrait to the next pair by the time she finishes saying “pass the portrait”. The teacher moves amongst the students during the discussions, pulling out ideas and writing them on the board to reference later. This routine quickly gets students engaged- there is art in their hands!- and discussing with one another. I used Pass the Portrait to teach my kindergartners the routine and expectations for the game- they are seated, they are talking in quiet voices, they are expected to work with anyone in the class, they finish their conversation by the time I get to 1, and they pass the portrait clockwise. After teaching them this routine, I realized the sky was the limit! For example, we used the routine at the beginning of the Ray Troll art kit. I printed out 15 images of Ray Troll Fish. We began the lesson by looking at one piece of exemplar art on the board and identified colors, lines, patterns, and shapes. We were then ready to play “Pass the Artwork”. We used the exact same routine as Pass the Portrait, except students were looking at Ray Troll images, and they were picking out colors, lines, patterns, and shapes. The discussions were rich, and when it came time for students to create their own artwork, they were inspired and had concrete ideas of what kinds of lines, shapes, colors, and patterns they could use. 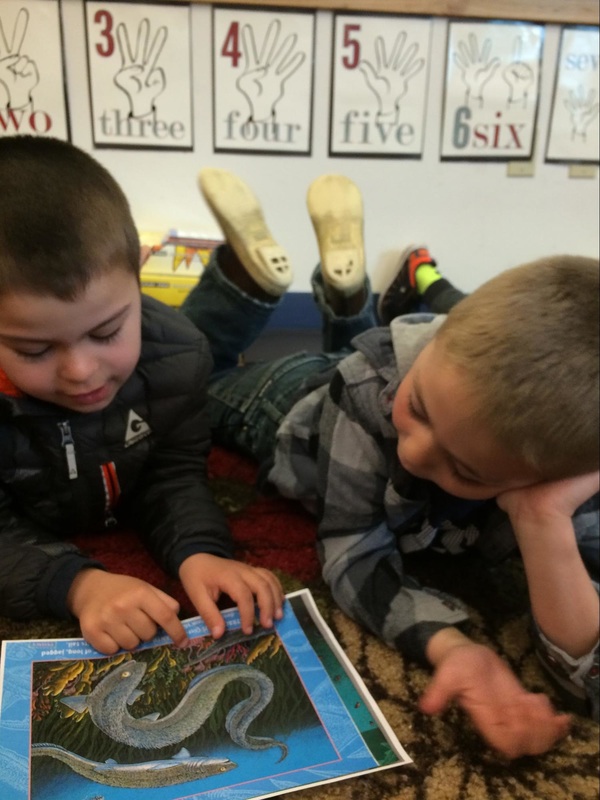 In another instance, I used the Pass the Portrait routine at the beginning of the Rainbow Flower Garden Art Kit. The kit comes with many colorful artificial flowers. We used used exemplar art to identify flower parts before students played “Pass the Flower” with the artificial flowers. The objective for their discussions during Pass the Flower was to identify flower parts (stem, leaves, flower) and describe the flower (it has 5 petals, it is colorful, it has one long green leaf, etc.)
|
ArtStoriesA collection of JSD teachers' arts integration classroom experiences Categories
All
|
 RSS Feed
|
|
Artful Teaching is a collaborative project of the Juneau School District, University of Alaska Southeast, and the Juneau Arts and Humanities Council.
|